Guy's Blog

Guy frequently keeps this blog updated with thoughts, challenges, interviews and more!

Tag: Training principles

We have to move.

If a shark stops swimming it dies- and if we stop moving it doesn’t take long before the problems mount up. We can get away with it for a bit longer than sharks, but sooner or later the bill comes due.

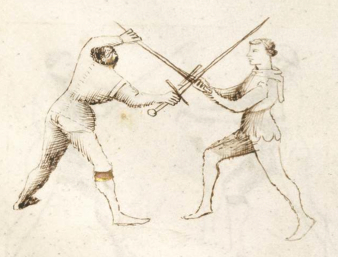
Swords are cool- cool enough to get people who have never even considered taking up a physical activity for fun before to actually start training. There are huge long-term health benefits to regular exercise, pretty much regardless of what that exercise is.

But no historical martial art is optimised for long-term health. It can’t be: the immediate needs of surviving the sword fight are more important than the possibility of eventually developing knee problems or back pain. 

The specific ranges of motion required by a given sword fighting style may be quite extreme (such as in a rapier lunge), but they will never be comprehensive: in no style ever do you do a gentle forward stretch with a curved back, or indeed arch as far back as you can sensibly go, or even just touch your heel to your arse to stretch your quads. Those ranges of motion are good for us, but not included in the martial arts themselves. 

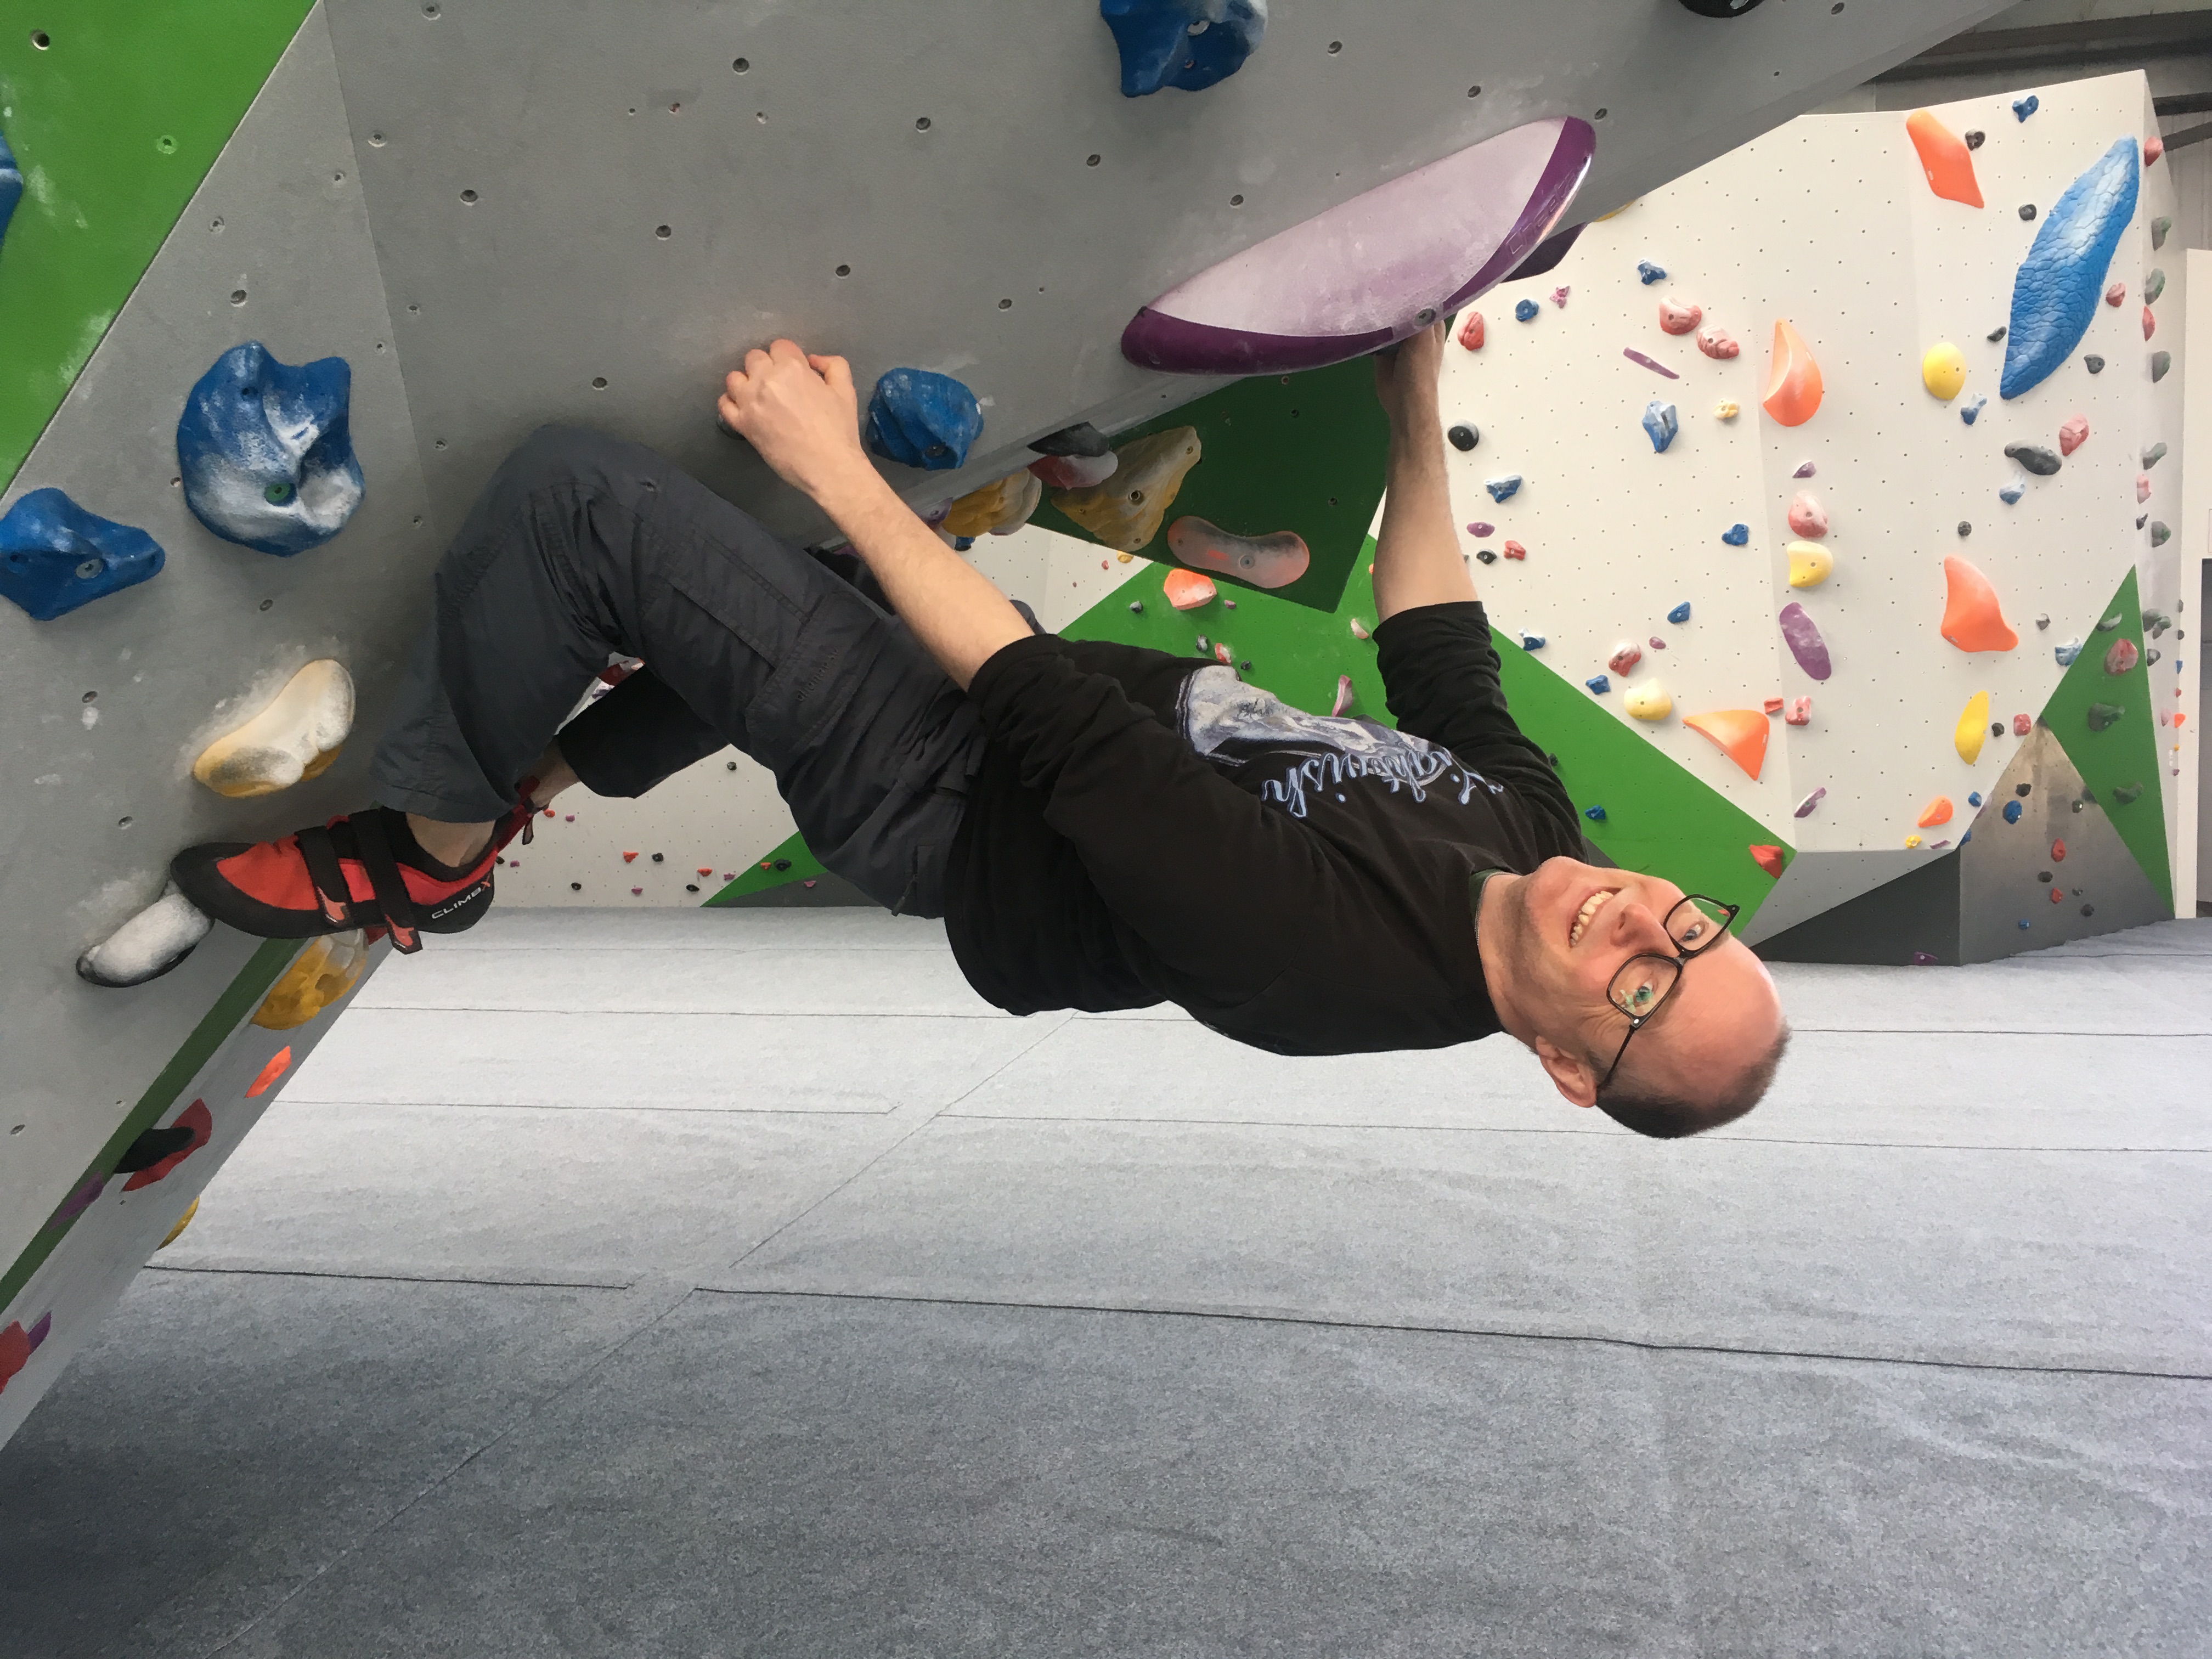
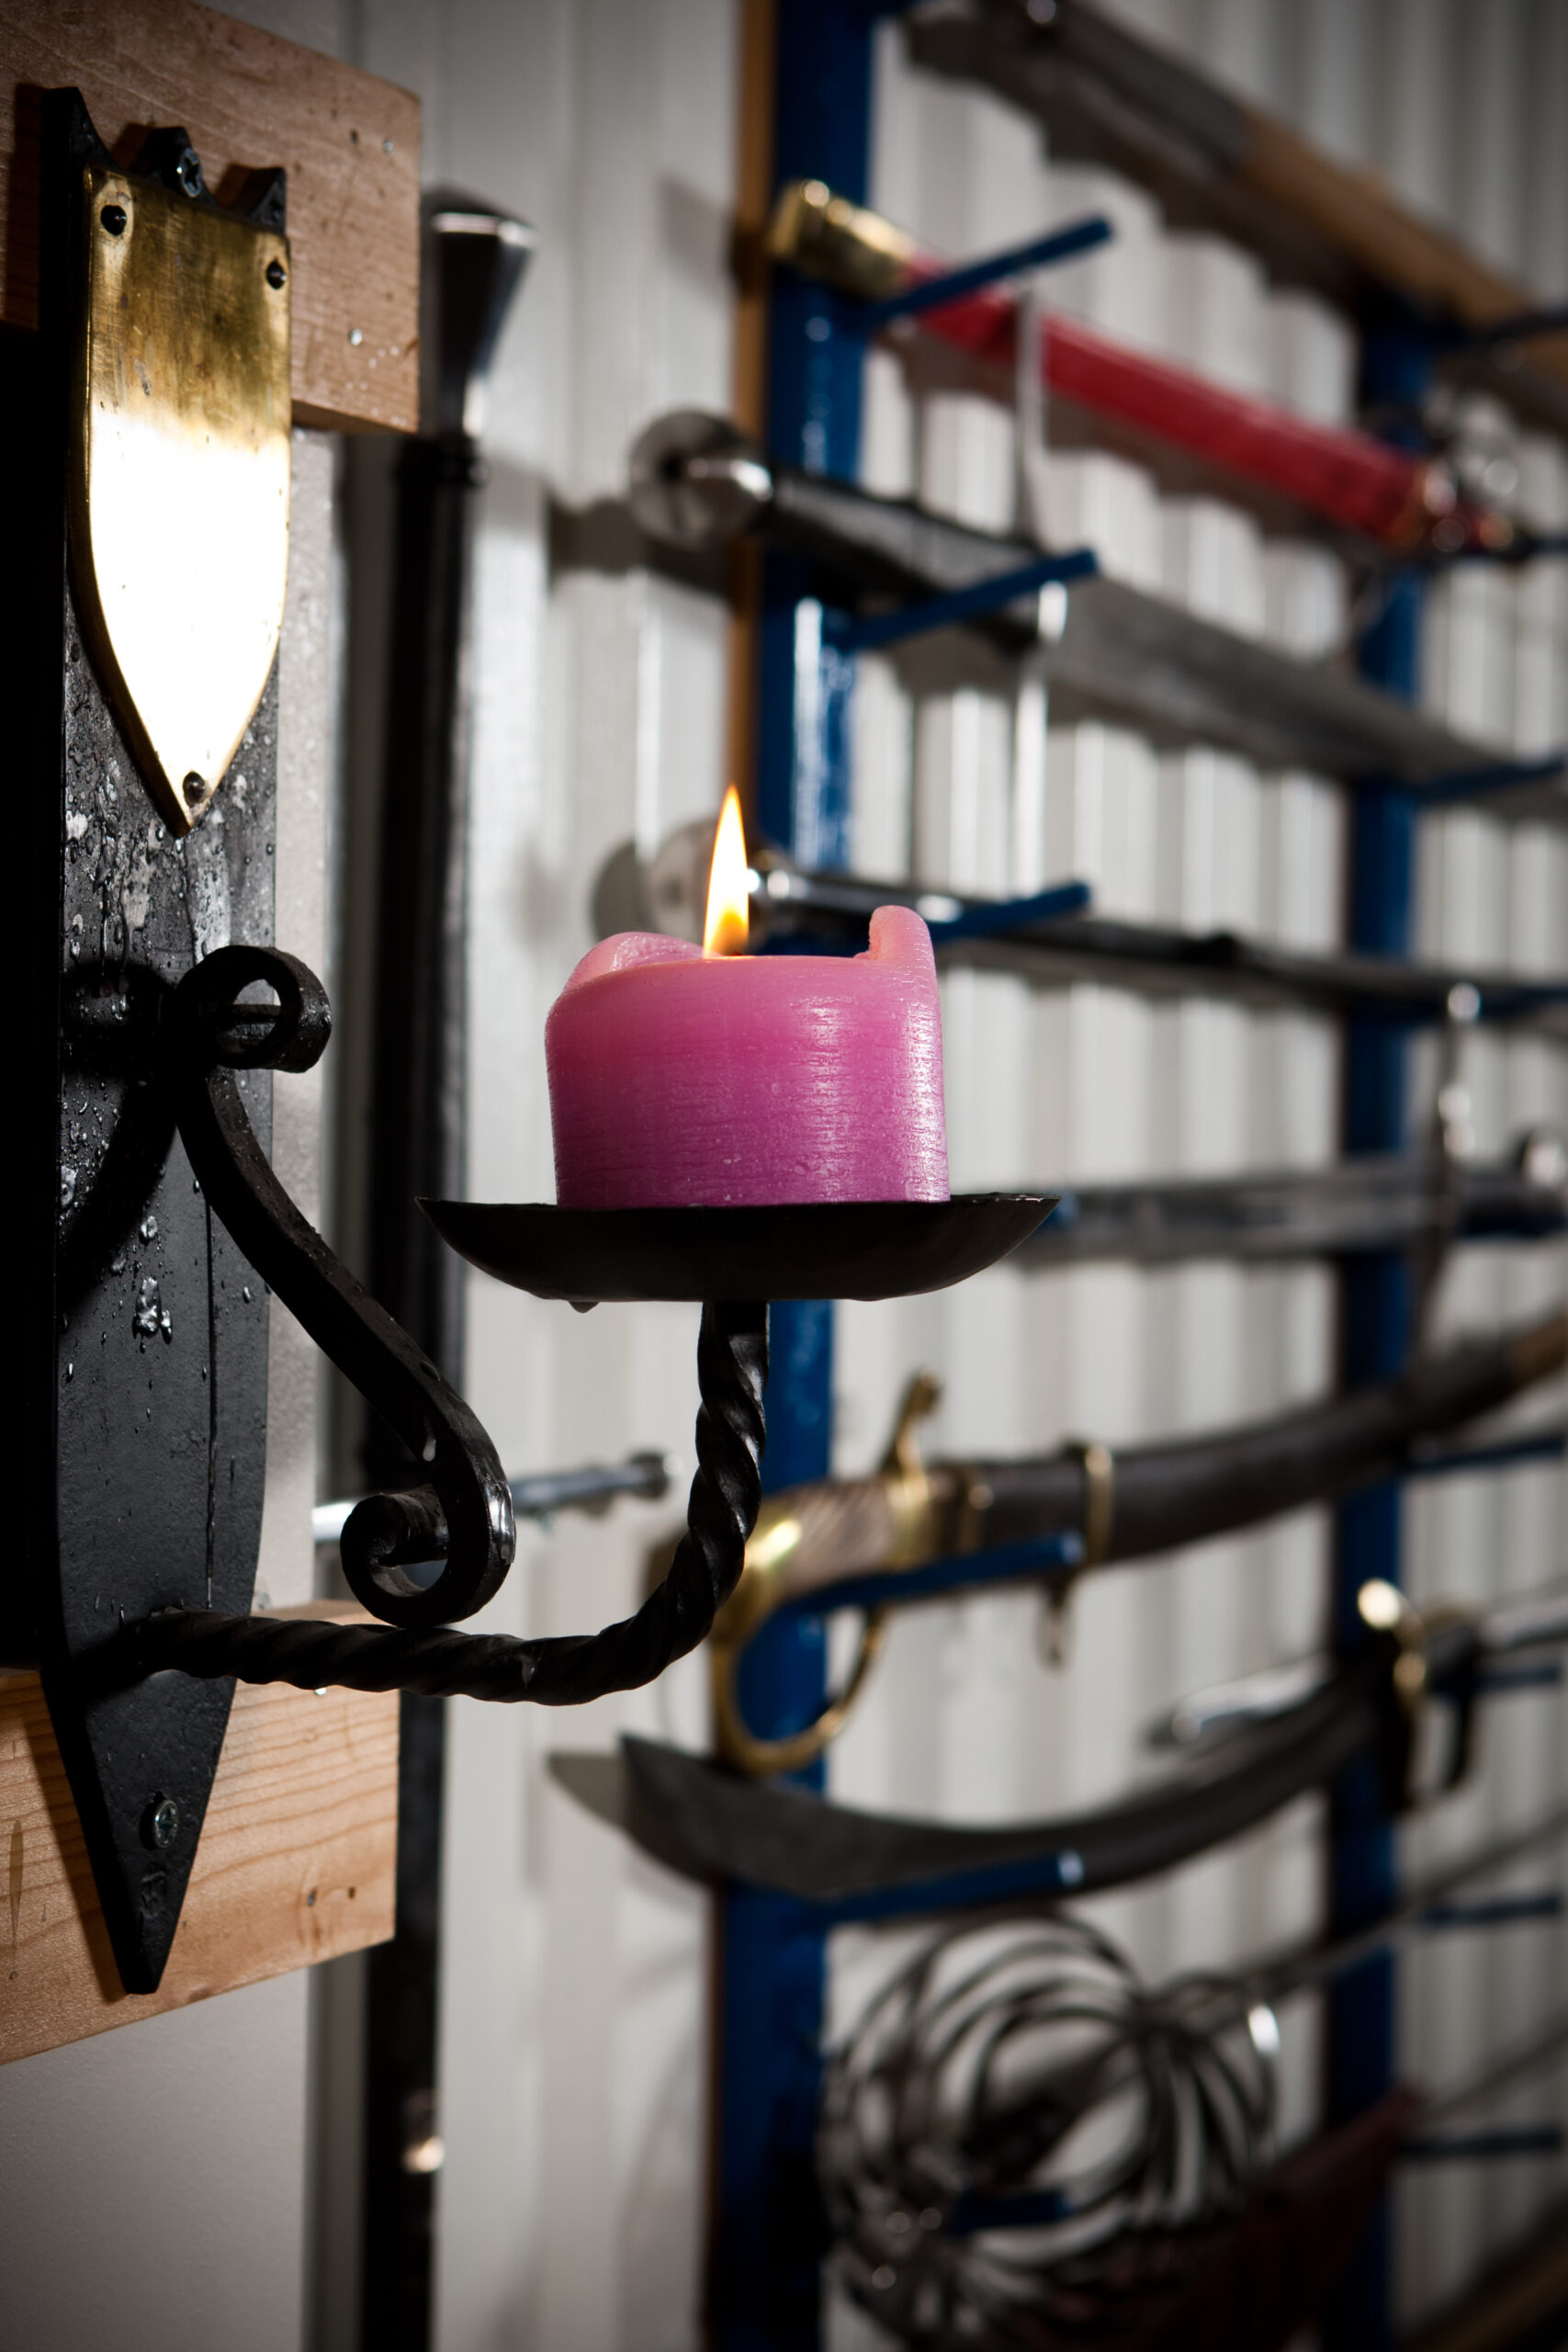
I intend to be swinging swords around in various historical manners for decades to come, and I’m already 48. It is therefore necessary to have a physical practice aimed at filling in the gaps, and keeping this carcase in sufficiently good shape that I can be whacking my friends over the head with blades when I’m 90.

I also need to be able to teach my students how to do the same thing- and there’s the rub. Every body is different, and so every training regime should be tailored to the individual. And every body changes over time- ideally getting fitter and stronger, but at least not deteriorating any faster than we can help. Which means that you can’t just learn a routine now and stick with it forever, if you want the best results for the least effort.

I cover the fundamentals of how to train in my book The Principles and Practices of Solo Training and we follow those principles in class. But the book doesn’t include much in the way of specific exercises, because it was intended to lay out the principles, not cover every possible practice. The book will tell you how to train, and how to prioritise your training time, but it doesn’t tell you whether you should be doing push-ups or lunges right now.

To create our practice we need a comprehensive suite of exercises to select from, and the skill to choose from that suite wisely. We also need to know what it is we are training for at any given time. Here are some possibilities:

  • Pre-hab. Long-term injury prevention through movement, range of motion work, breathing and strength training. This is perhaps 50% of all my training.
  • Conditioning. Increasing our strength, speed, range of motion, or other attribute, through exercises of various kinds. This is about 40% of my training.
  • Warming up and warming down: preparing for a specific kind of movement (such as strength training, rapier footwork practice, a longsword tournament bout, or any other high-intensity activity), and promoting recovery afterwards. You may need to warm up for pre-hab or conditioning, of course.

A specific exercise such as an overhead press, or a push-up, or a hamstring stretch can be used in all three of these situations- but how we use it will differ. 

Structuring a Training Session

I run a Trainalong training session over Zoom three mornings a week, and usually structure them like so:

Section One: warm-up.

1. Running a diagnostic. Gentle joint rotations from toes to fingers, with a few squats and some gentle range of motion work. This tells me whether I need to pay attention to a specific area, and whether the session I had in mind is likely to be a good idea.

2. Full range of motion of the spine

3. Shoulder stability work

Section Two: conditioning

Focusing on my own areas of weakness, especially forearms.

1. Some kind of strength work, often bodyweight or kettlebells

2. Leg stability work such as seven-way legs, or kicking practice

3. Forearm conditioning

Section Three: skills practice

1. Some kind of footwork

2. Some kind of weapon handling (though often disguised as stick conditioning drills or bladebell exercises). These are often combined with the footwork, of course.

3. And/or breathing training, such as the Breathing Form.

Section Four: recovery

1. Some breathing

2. Some stretching, especially of the legs

3. Forearm and leg massage (which you may be familiar with from my free Human Maintenance course)

4. A very short meditation

5. Deliberately finishing.

Seeing it broken down like that doesn’t reflect the experience of it. The sections will blend into each other, and overlap- we may intersperse arm weights with footwork, for example. I very often include planks and other “core” work in with the spine range of motion or hip/knee stability exercises. The full-body survey at the beginning and the warm-down ending sequence tend to be quite consistent. I also adjust the training depending on my own health and current needs, and incorporating any requests that the students bring up on the day. 

Some of the weird stuff we do sometimes includes jaw relaxation exercises, toe yoga, and finger dexterity drills. 

I’ve attached a fairly comprehensive list of the exercises we do as a pdf below. Be warned, it’s just a list, and “Granny’s Scarf” may not mean anything to you just yet. But it should give you an idea of what I mean by ‘comprehensive’. 

What about the skill to choose wisely from the list?

That is primarily a matter of mindset. If you go into a session with the intention of finding out what your body needs, and then carefully doing that, you will probably avoid injury, and certainly become better at listening to your body. As every body is different, I encourage my students to adapt or adjust what we’re doing to suit them. I may be recovering from an injury or illness, and be doing some gentle recovery work when we’re twenty minutes in- you may need to be doing push-ups or kettlebells while I’m resting. While the class is doing Turkish Get-ups, a student with a knee problem may be doing her prescribed rehab exercises.

Levels of Difficulty

Every exercise can be done at various levels of difficulty. Let’s take the humble push-up for example:

1. Knees on the ground, go down an inch.

2. Knees on the ground, work up to going all the way down.

3. One leg extended

4. Full push-up position, hold

5. Working up to a full basic pushup

6. Different hand positions- three knuckle, two knuckle, one knuckle, prima, seconda, quarta, hands wide, long, staggered, etc.

7. Going for more repetitions

8. Slow push-ups (eg 30 seconds down, 30 seconds up)

9. Plyo push-ups, eg clap push-ups, or push-up-twisting-squat-jump-burpees

10. One-armed push-ups

11. One-armed push-ups with different hand positions

12. Plyo one-armed push-ups

And so on.

I may be working on 6, while one student is on 2, and another on 11. Literally every exercise has easier and harder versions, so can be adapted to anyone’s current level.

Join Us!

It is very relaxing to just show up and do as you are told for a while, and indeed having a personal trainer who knows you well and pushes you as needed would be great. But as martial artists, more is expected of us. We can’t be dependent on external forces to guide our training- we must take ownership and responsibility for our own development. And outside a one-to-one coaching session, no trainer can perfectly adapt the class to your needs. But you can. 

One way to learn to do that is to come to my Trainalong sessions. You can find them in our Sword People community.

 Everyone is welcome, whether you’re super-fit or not fit at all (yet). You won’t hold up the class (or be held up) because we are all moving at our own pace.

Useful resources on this topic:

You may find The Principles and Practices of Solo Training helpful.

I cover a lot of the exercises in the Solo Training course, though that course focusses primarily on weapons handling. https://swordschool.teachable.com/p/solo-training 

You can have a go with a sample session here:

You can download the exercises list here: Trainalong Curriculum

You may find my conversation with biomechanist Katy Bowman: Movement Matters.

I am often asked by students if they are “ready” for a class with me. It's a common insecurity- nobody wants to feel that they are holding the class back, or be overwhelmed by a fire-hose of information. I actively seek out opportunities to be a beginner, partly so that I can better understand and empathise with the beginners who train with me. One such opportunity occurred earlier this year.

I started bouldering (indoor climbing on low routes, no ropes) a couple of years ago, and on January 20th 2020 took a class with Neil Gresham, at my club, Avid, in Ipswich. It was a great example of being in a too-advanced class way over my head. But it has been really useful, and while the specific insights regarding bouldering are probably not useful to you, the process of extracting the most value out of a class that is way beyond your current level will be.

There were 10 students, varying in experience from dazzlingly good (from my perspective), to my friend Katie and I (one year of about once a week). One person in the class had been climbing for only two months but was elegantly smashing routes I can’t do (yet), so Katie and I were definitely bottom of the class. Which is the best place to be- literally everywhere you look you can see someone more experienced doing something interesting.

You should never give up the opportunity to take a class with a great instructor just because you’re “not experienced enough”. Sure, your brain may fill up in the first ten minutes, but that’s ok, there are ways of capturing the rest of the class for future reference. I’ve been working on the insights from this climbing class for nearly a year now. Money very well spent! But that's only possible because I captured the class outside my brain, and then refiled it.

In short, the process is this:

1) expect to be out of your depth, and to stop taking in new information early in the class

2) take detailed notes (I use pen and paper with stick-man sketches, but any system that works for you by definition works)

3) write up your notes as soon as possible after the seminar. Ideally on the same day. Notes work to trigger memory, and the longer you leave it, the less effective the trigger will be

4) summarise the key points.

Here is my somewhat edited write-up of the seminar, with topics bolded so I can find them easily:

We began with some opening remarks, Neil introduced himself, and asked a couple of questions to get the feel of the class. Then we warmed up. The instruction was to do vigorous exercise for a few minutes to get the blood pumping. Wind sprints, burpees, and running were suggested. I did all of those, plus some monkey walks.

Then Neil lead us through some basic joint rotations; shoulders (as front crawl, then reversed), hip rotations (forward-back, then side). He advised to avoid passive stretching before climbing (I agree 100%).

Then it was shoes on, and to the wall. When warming up on the easy grades, here are the rules for improving footwork:

1. No sliding your foot down the wall onto the foothold.

2. No re-placing the foot after contact with the hold.

3. Silent feet.

4. Watch your foot until after you’ve made contact with the hold.

Goal: to improve precision in footwork that will help with harder climbs.

Practice. I spent some time on a green-grey (easiest) grade. It’s surprisingly hard to be that precise, even on really easy climbs. This one approach had me thinking two things:

  1. why the hell didn’t I think of that? It’s so very like how I teach swordsmanship footwork: use very basic drills to concentrate on foot placement.
  2. I’ve got my money’s worth already. Everything after this is a bonus.

Then we re-gathered, and Neil talked about arms.

  1. Keep them extended but not locked, as much as possible.
  2. Bent legs, straight arms.
  3. Keep the shoulders engaged though, so you’re not hanging on your joints.

Practice: back on the easy grades. Indeed, as he said, especially at the start, it’s tempting to step up onto the footholds, pulling yourself into the wall. It’s better to hang from the handholds, bending the legs as much as necessary.

Finally, grip: we re-gathered and Neil challenged us to climb easy routes using the minimal tension in our grips. “Use the friction of your skin” to hold on.

Practice: with precise feet and straighter arms and relaxed hands.

Summary: when warming up on the wall, use these rules to encourage precision and minimal strain when climbing. This mental focus will also help transition you mentally from normal life to climbing.

This was followed by a discussion of bouldering training sessions: either volume, or intensity. Volume sessions involve a lot of easier grade climbs. Intense sessions involve working on a few very hard (for you) problems.

Techniques for overhangs:

We went to a part of the wall that overhangs, and Neil talked about how to do it. Fundamentally: left foot goes to right holds, and right foot to left holds. This allows you to reach with an extended arm. No frog-clambering (my term, not his). This did make life a lot easier, where the holds were set up to allow it.

If you have a right foot on a right hold, or vice-versa, you can “flag”: if there’s space, reach through with the other foot inside the one on the hold. If the foot on the wall is too high for that, you can flag “outside”. This has a similar body placement effect to having your left foot on a right hold, etc.

Note: “avoid a pull-ups competition”. Good advice, especially for me. I tend to rely on strong arms more than is gracefully optimal.

Volume sessions: When doing a volume session, try a pyramid approach: start easy, get harder, hardest climbs at the mid-point of the session, then ease back down. (Same idea as our pyramids: 1 pull-up, 2 push-ups, 3 squats; 2,4,6 etc. Until you max out on one (e.g. 4 pull-ups). Then back down the pyramid: 3-6-9, 2-4-6, 1-2-3.)

“Project” sessions: warm up with 10-12 easier climbs, then pick 2-3 hard problems and work on them. Not too long on any one, or you’ll get tired. Rest: rule of thumb is 1 minute rest for every hand move.

Using the circuit board (a wall with graded routes that go in a circle round the wall, for endurance training): two approaches:

1. “Strength”: pick one hard circuit and go round once. Rest, etc.

2. “Endurance”: pick an easier circuit, and do laps (e.g. 3-4). This trains you for longer climbs, such as rope work outside.

I didn’t mention in class that I find going round once on the easiest circuit to be a sufficient challenge to my endurance! But I’ll work on it, starting by just doing a few moves after the end of the first circuit, to get out of the habit of automatically stopping at the end.

Supportive Conditioning”: for injury prevention. Assuming you’re not a gym rat (good call).

#1 most important exercise to prevent tendonitis: finger extensor training, opening the hand against resistance, e.g. using an exercise band. 3 sets of 20, 2-3 times per week. Yes this is useful but I think I should do a class on forearm maintenance for climbers. They all seem to get tendonitis! (You can find my forearm conditioning training here)

#2 easiest supportive conditioning: push-ups. 3 sets of 10-25, twice a week.

#3: TRX handles on straps (I’d use my gymnastics rings at home). 3 exercises shown, all knees on floor to start:

1. Push-ups

2. Pec fly, arms out to the sides at shoulder level, recover.

3. Plank, extending the arms out in front like diving into a pool, recover.

#1 stretch, after EVERY climbing session: hand flat on wall, shoulder height, fingers pointing down (extending the wrist). Extend other arm about shoulder height like in a pec fly, look out over your extended hand. Seems useful.

Other stretches recommended:

1. feet wide, knees wide, squat and push knees apart to open hips.

2. Standing, knee to chest, pull knee in to stretch hip.

Best takeaways:

1) After the usual warm-up, warming up on the wall with: precise feet, extended arms, and minimal grip.

2) Flag on overhangs.

3) Pyramid sessions.

4) Use circuits more.

5) Why have my rings been in a box in the shed for the last year?


And finally:

As you can see, that is a TON of information, way more than even the more experienced climbers will be able to remember the next day. How many sets of how many push-ups was it?

And here's the kicker. I'd accidentally left my notebook and pen at home, so I borrowed a pencil and a single envelope from the reception desk. Literally ALL of that was captured in note form, covering both sides of an ordinary envelope (about 4 inches by 9, or 10cm by 22). Notes do not have to be extensive to be useful.

The specifics I tried to capture were notable phrases (such as “avoid a pull-ups competition”), the overall pattern of the class (or I would certainly have forgotten entire sections), and as many specifics as possible (such as “finger extensor training, opening the hand against resistance, e.g. using an exercise band. 3 sets of 20, 2-3 times per week”). Then when writing out the notes, I added as much detail and experience as I could recall.

Experienced students are able to remember more than the less experienced simply because they can chunk the information, and fit it into pre-existing patterns in their heads. I didn't have the experience to chunk the information, nor the pre-existing patterns of climbing theory, terminology, and practice. But even though the class had way more information than I could possibly make use of at the time, and so way more than I'd be likely to remember, I could effectively use the class insights months later when I was ready for them, because I have a way to file them outside my brain.

This is actually better than videoing the class, because it depends on the write-up immediately afterwards. Information outside your brain is of no practical use. To be useful, it must be stored inside your brain. Having a video of the class will tend to let you believe that you have it all available, and so you'll forget to ever watch the video, and the information never breaches the world/brain barrier. But having dodgy notes on a scrap of paper that simply must be written up soon or it will become useless forces you to re-enter the information in another format, which massively improves retention. I saw and heard the class, and experienced the exercises, now I have to recall the class from notes and memory, and re-create it as text. That regurgitation process is absolutely key to getting your brain to hold onto the information.

I hope this is useful, and perhaps persuades at least one beginner to jump in the deep end and take a class above their level. Feel free to share.

cover of complete rapier workbook which includes how to train swordsmanship

This post is borrowed from The Complete Rapier Workbook  and follows on from How to Train Swordsmanship (or anything else) Part One.

The “Rule of Cs”

The “Rule of Cs” determines how every drill can be practised.

1. In the beginning, you learn set drills by Co-operating in creating correct choreography.

2. Once the choreography is smooth, increase the difficulty by increasing intensity, or introducing a degree of freedom, with one player adjusting the difficulty for the other to learn at their most efficient rate—if it works all the time, ramp it up—if it fails more than twice in ten reps, ease off a bit.

This is called: Coaching correct actions.

3. Finally, the players each try within reason to make the drill work for them. This can be dangerous if it gets out of hand, so be careful, and wear full protection just in case. In practice, the more experienced fencer should get most of the hits, without departing from the drill. This is fine, and gives a good indication of whether your training regime is working. So: Compete.

Let’s stick with Plate 7 from Capoferro as our example and run through a specific series of degrees of freedom, and apply the Rule of C’s so you can see the idea in practice.

  • In the basic form of the drill, there are no degrees of freedom.
  • Set up the drill, but the one stringered can, at the moment of the stringering, attack by disengage, or feint. That is one degree of freedom.
  • Start out with the stringerer obliged to attack in both cases. This makes for a nice choreographical drill.
  • Once that is stable, then the stringerer will only attack if they believe they have the tempo. This is a second degree of freedom. The stringered’s job is then to sell the feint.
  • Now we must ask the question who is coaching who? Because if the stringerer is coaching the stringered, then they must adjust their response so that the stringered gets better at feinting. If it’s the other way round, then the stringered must adjust their feint so that the stringerer gets better at identifying feints from real attacks.
  • You can also play the drill competitively. Without changing the drill, but allowing these two degrees of freedom, you can compete with your partner. If you are stringering, you are just trying to get the tempo for the parry-riposte in one tempo; if you don’t get it, don’t go. Your partner will be trying to trick you into it, with the occasional feint. 

There is a significant risk of this getting out of hand; be mindful as you play the drill competitively that you must stick to the constraints of the drill that you have both agreed on. Otherwise you lose track of the rationale behind what you are doing, and mistakes creep in that are difficult to spot and to trace back to their source.

Coaching

I kind of dropped you in it in the previous couple of drills: I got you coaching without teaching you exactly how. So let’s have a look at that specific skill. In any drill you must have a clear definition of success. In a tournament bout, that’s winning within the rules. In a basic set drill, it’s making the choreography as correct as possible.

  • In a coaching environment, the student’s success is defined as getting measurably better at the target skill.
  • The coach’s success is defined as: the student is successful.

Be very clear on this before moving on. If the coach is doing their job properly, they will get hit over and over. Because in fencing, the student is successful if, and only if, they hit the coach, but do not get hit.

The coach’s job is to create an environment in which the desired action will work, and everything else will fail. Failure is defined as the student not hitting, and getting hit.

The coach is providing a feedback mechanism. If the student is performing the desired action at the desired level, then they will be reinforced by immediate success; if they do anything else, or do the desired action at an insufficient level, the student fails to hit, and gets hit. 

This is why a good coach can get preternaturally fast results, because they can create and control a perfect learning environment, in real time.

In a perfect world, every historical fencer would have access to a high-level coach and spend much of their time one-to-one with her. In the real world, that’s never going to happen, so you and your partner must learn the basics of coaching so you can help each other develop.

As with every other skill, you will get better with specific practice. So in this next drill, let’s be clear about who’s training whom. We are studying coaching, so it is the coach whose performance we really care about. We measure that performance by the improvement of the student.

Coaching the Attack by Disengage

I have been preparing you for this over the last couple of workbooks. Begin with the Buckler Game. The one holding the buckler is the coach. You’ve done this many times before, so pay attention to the mindset: the total focus on your partner’s improvement. This is the mindset you’ll need for the following exercise.

You’re going to improve your partner’s attack by disengage. This action occurs in almost every Plate in Gran Simulacro, so it’s quite important.

  1. Start by setting up a static, basic version of Plate 7 and Plate 16, steps one and two. You step in to stringer, your partner attacks by disengage. Make sure the choreography is there, and that you both know what you’re going to be working on.
  2. Then reduce the window of opportunity for the attack by disengage, by stepping into measure, and immediately back out again. Not fast, but no pause. The student has to time their attack for when you will be there in measure.
  3. Then follow their attack with a strike of your own, in any line. They must be recovering, and parrying if necessary, after their attack.
  4. Then have the student keeping measure with you, waiting for your blade action (taking the line with a stringering) before they attack by disengage.
  5. Finally, have the student keeping measure, and remaining defensive after their successful (or unsuccessful) attack.

The coaching exercises we’ll be doing in the rest of the book will generally follow this same pattern:

  1. Set up the basic, static, drill
  2. Reduce the window of opportunity for the target action, by either reducing the time it’s open, or providing mechanical resistance
  3. Add a step: make sure the student is getting out under cover after striking
  4. Add movement: have the student do the action while moving (so the drill doesn’t start with them standing still). Refer to “Who moves first?”
  5. Add both the step and the movement, so they have to do the target action while moving, and remain defensive after striking.

You can see this drill on video here:

We are scratching the surface here, but I hope you can see that this approach will turbo-charge your training by deliberately designing your success.

cover of complete rapier workbook which includes how to train swordsmanship

This post is borrowed from The Complete Rapier Workbook

How do you take things you already know, and make them actually work under pressure? How do you become a swordsman/swordswoman/swordsperson, not just a person who knows some sword moves? This is the heart of swordsmanship, and it’s most sophisticated element. The key skill to learn is how to coach, because that’s how your training partner will get better. And as they learn themselves, they can coach you.

This is the difference between evolution by natural selection and intelligent design. If you just fence, sure enough you will get better. Slowly, and in a haphazard way. But using a disciplined approach, you can deliberately work on your areas of weakness, find and enhance your natural areas of strength, and deliberately, intelligently, improve. 

Birds are amazing examples of the awesome power of evolution. But compare them to the history of powered flight. By the application of intelligent design, we got from a short hop of 120 feet in 1903, to the moon in 1969. Evolution can go suck eggs.

This is the kind of astonishingly rapid improvement that we are aiming for in every training session.

We get there by building a bridge between your current level (whatever that is) to where you wish to be: expert fencer.

This idea is the heart of my new workbook: Rapier part three: Developing Skills. Much of this blog post is adapted from the book.

It is relatively easy to teach set drills to a student or class. She does this, you do that. And it is relatively easy to set up a freeplay (sparring, fencing) environment that is reasonably safe. I have seen many groups and schools that have nice set drills, and freeplay quite a bit, but there is no real relationship between the two kinds of training, and nothing in between those two extremes. As a result, the things done in freeplay bear scant resemblance to the actions in the drills. In the new workbook I will show you how to build a bridge between set drills and freeplay. This is especially important for historical swordsmanship, as the manuals tend to show short, simple sequences (an attack and a defence, usually) which are easy to turn into drills, but very hard to pull off in friendly freeplay or against a resisting opponent.

In a nutshell, you need to be able to identify your areas of weakness, and fix them. We do the former by running diagnostic drills, and the latter by training at the optimal rate of failure. 

Run a Diagnostic

Almost any drill can be used as a diagnostic. The purpose of a diagnostic drill is to establish at what point you are failing. Taking Plate 7 as an example, by running through it you may find that you don’t remember the drill (solution: learn the choreography. Refer to the first workbook), or one part of the drill isn’t as good as it should be. Your disengage, for example. Or your parry. It doesn’t matter which, it only matters that you can find it. For this you need clear feedback mechanisms.

This approach can be applied to any weapon and any system, of course, but I’ll stick to rapier examples for now.

Feedback mechanisms

The best feedback mechanism is a partner who will invariably hit you when you make a mistake, and who you will invariably hit without getting hit, when you do something right. 

That partner is a coach.

But nobody is perfect, so your training will be slowed down by false positives (you hit with things that shouldn’t work, or your partner fails to hit you when you’ve left an opening), and false negatives, when you’re doing the right thing, but your partner prevents it from working in a way that isn’t useful for your development.

Secondary feedback mechanisms include video cameras, so you can see what actually happened, and verbal feedback from coaches and training partners.

Direct immediate accurate feedback is the holy grail of training. Quest for it.

The Optimal Rate of Failure

The optimal rate of failure in combat is zero. But in training, the optimal rate of failure is about two out of ten. Whatever you are doing should work 80% of the time, and fail the other 20%. If you are succeeding 100% of the time you’re not learning anything. If you’re failing much more than 20% of the time, you will get frustrated, and frustration is the enemy of learning.

The coach’s job is to keep the student training in that zone: and for the coach, the optimal rate of failure is zero. Because the coach isn’t supposed to be training: they are supposed to be the perfect feedback mechanism.

The rest of the workbook addresses exactly how to do that, like so:

  1. Addressing the common psychological impediments to learning swordsmanship.
  2. Building a bridge between set drills and freeplay. By deliberately layering up the complexity, we can improve faster.
  3. Learning to identify the problem areas.
  4. Learning how to modify drills to fix specific problems.
  5. Learning how to coach.

This post has been all about the theory of practice… if you've enjoyed this post but rapier isn't your thing, you might find the Theory and Practice of Historical Martial Arts interesting, or indeed the next post in this series: How to train Swordsmanship, part 2

It has been a very long time since I showed up to a martial arts club as a beginner, but over the summer I found myself looking for a regular martial arts class that fit my schedule, and in which I had no experience. I stumbled upon Jushinkan, here in Ipswich. I asked about beginners’ courses, but they said to just show up, so I dug out my old gi and toddled along to class.
I hadn’t really thought about it, but it turns out that in my head there was already a list of things to look for in a martial arts school or club. I realised this when the instructor (Richard, an 8th dan, who is so old-school that he doesn’t even do email) hit every single point on my unconscious checklist. He asked me whether I had any experience (I said yes, but not in this art); any disabilities or injuries he should know about (none), and told me that it was ok to sit out any exercise I felt would be bad for me. I felt welcome, and under no pressure to perform.
Richard ran us through some naginata, spear, and sword kata. He said things like:
“this is not self-defence” 
“this is stylised, for kata. The applications might look like this, or this”
“now if that doesn’t work, try this”
“this is a last-ditch I’m probably going to die but I’ll try this anyway situation”
“no, grip me really hard as if your life depended on it, so we can see if this really works”. 
Hitting the items on my list like he’d read my mind.
With about forty minutes left of class time, he handed the class over to a young man (about half his age) who “is much better than me at ground fighting, so he’s going to cover this stuff”. Absolutely no standing on rank whatsoever.
And the person I was paired off with was not just very skilled, but an artist, alive to the nuances of the actions. 
After my second class I was sure I’d be coming along regularly, so I took the instructor aside and told him what I do for a living. His reaction was enthusiastic delight, and the hope that I’d perhaps teach a class for them sometime, because they are always looking for new approaches.
If training is any use at all, it changes you. The demeanour of the more senior members of a club is a pretty good guide to how a club is run and what effect the training has on your character. Every other member of the class on that day (and on most days since) were very experienced: I’m usually the only one on the mat without a black belt. And everyone, without exception, has been friendly to the newbie, and highly skilled. The other night a couple of young women came to watch class, one of them in a hijab. One of the club’s founders, Brian Rogers, another 8th dan with about 40 years experience, spent the entire evening going over the absolute basics with them. Nobody found it remarkable.
I have learned a great deal so far, especially about joint locks, takedowns and ground fighting, but that is perhaps the least important aspect of the club and the style. It is much more important to me that I could recommend it to anyone without even thinking about how they will be treated if they show up.
If you are lucky, you’ll be wondering why I bothered to write this post: surely that’s how all martial arts clubs are run?
It isn't, but it should be.

safety-guidelines-cover

Safety Guidelines for the Practice of Swordsmanship

These safety guidelines come from my Recreate Historical Swordsmanship from Historical Sources Course (included in our Mastering the Art of Arms and Solo Training packages here) and have been adapted from guidelines in The Medieval Longsword, The Duellist's Companion, and The Theory and Practice of Historical Martial Arts. All of those books are included as downloadable pdfs in the additional course material.

Climb if you will, but remember that courage and strength are nothing without prudence, and that a momentary negligence may destroy the happiness of a lifetime. Do nothing in haste; look well to each step; and from the beginning think what may be the end.

Edward Whymper’s admonition, from Scrambles amongst the Alps, elegantly encapsulates the correct attitude to all potentially lethal activities. Substitute “practice swordsmanship” for “climb”, and there is the correct mindset for any swordsman, beginner or expert. Take it to heart before you start training with a partner.

When training with weapons you hold your partner's life in your hands. This is a sacred trust and must not be abused.

Disclaimer: I accept no responsibility of any kind for injuries you sustain while you are not under my direct personal supervision. During this course you will be taught how to create safe training drills, and I am certain that if you follow the instructions there is a very low likelihood of injury. But if I am not there in person to create and sustain a safe training environment, I cannot be held responsible for any accidents that may occur.

Principles

The basic principles of safe training are:

  1. Respect: for the Art, your training partners, the weapons, and yourself.
  2. Caution: assume everything is dangerous unless you have reason to believe otherwise.
  3. Know your limits. Just because it’s safe for somebody else, does not necessarily mean it’s safe for you. Never train or fence when you are tired, angry, or in any state of mind or body that makes accidents and injuries more likely.

Most groups that keep going for more than a year have a pretty good set of safety guidelines in place. Make sure you know what they are, and follow them.

My senior students routinely train with sharp swords, often with no protection. That’s not as dangerous as it sounds, when you remember that they have been training usually for 5+ years at that point, under my supervision.

Safety first: you cannot afford time off training for stupid injuries. Life’s too short. Whatever training you are doing must must must leave you healthier than you started it. You will not win Olympic gold medals this way, but you won’t end up a cripple either. The path to sporting glory is littered with the shattered bodies and minds of the unlucky many who broke themselves on the way. Don’t join them.

Every time I find myself teaching a group I don’t know, I tell them that the class will be successful from my point of view if everyone finishes class healthier than they started it. Most injuries in training occur either during tournament (highly competitive) freeplay, or are self-inflicted during things like warm-ups. In my school (and other classes) we have a zero tolerance policy on macho bullshit.

If any exercise doesn’t suit you, for any reason, you can sit it out, or do some other exercise. If you are sitting it out, a good instructor will ask you why, and help you develop alternatives or work up to the exercise in easy stages, but will never pressure you to do something that might injure you.

This is also true of work-related injuries, like forearm problems from typing, or the ghastly effects of sitting all day. By avoiding the things that will hurt you, you will naturally seek out the things that are good for you. Hungry? Avoid sugar, avoid processed foods, and lo! there’s a fresh salmon salad. Tired? Sleep is better than barbiturates, no?

This requires good risk-assessment skills (I recommend Against the Gods, the Remarkable Story of Risk, by Peter Bernstein) and the courage to take risks that truly serve your overall aims. A safe life is not worth living, but foolish risk-taking will not make your life meaningful.

Try adopting these key habits:

  • Before any new activity, do a risk/reward calculation. How risky is it, and how
    rewarding?
  • Practice saying no to training suggestions: even safe ones. Most people do stupidly
    risky things due to peer pressure. Being able to say no to your peers is perhaps the most important skill in reducing injury rates. If this is hard, make it a habit to decline at least one suggestion every session, until it’s easy.

Equipment

Without doubt the single most important bit of safety equipment is good common sense. Fence according to the limits of your equipment, exercise control and respect the weapon at all times, and you will never have a serious injury. Minor bumps and bruises come with the territory.

There were some masters who believed that the safest course is to fence with sharp weapons and no protection. This is how it was often done in the past until the invention of fencing masks (though there are tournament records and declarations as early as the 14th century that record the use of blunt practice weapons; King Rene d’Anjou’s treatise of 1470 is perhaps the best source). Such masters are right in theory, in that freeplay with sharps is the best way for students to learn absolute respect for the weapon, and the importance of absolute control. There are a few contemporary masters with whom I will fence like this, and there is nothing like it for generating a perfect fencing approach. But try explaining that to the insurance companies, or in the event of a slip, the police or coroner.

It was often said in the eighteenth century that you could tell a fencing master from his eye-patch and missing teeth. Never forget that even a blunt blade can break bones. When free fencing, or when practicing drills at speed, it is essential that you wear appropriate safety gear. You do this not for your own sake, though self-preservation does come into it, but for the bene t of your training partner. Your protection allows him to hit you safely.

Choosing protection is a very controversial subject. Too little, and you can end up badly hurt (even in practice). Too much, and you can’t fence properly. Firstly, it is important to establish what style of fencing you will be doing. If you are practising armoured combat, then buy the best fitting, best made armour that you can from an armourer who knows how you intend to use it and has seen what you want to do. This is the hardest style of fencing to appropriately regulate, because accurate technique requires you to go for the least armoured spots (throat, eyes, armpits, joints), but safety requirements obviously prohibit that.

As a general guideline, I recommend the following for most weapons.

  1. An FIE standard fencing mask. This allows you to thrust at the face (a very common target), and generally attack the head. This does have three major caveats. Firstly, it leaves the back of the head open, and you must be very careful not to strike at this target. An added apron of thick leather affords some protection. Secondly, it does not protect the head and neck from the wrenching force of over-vigorous blows. It is vital that you and your opponent learn control before engaging in freeplay. Thirdly it is designed to protect the face from high-speed, light, flexible weapons, not slower, heavier, rigid ones. So continually check them for wear, and make absolutely sure that your weapons are properly bated.
  2. A steel or leather gorget, or stiff collar, to protect the throat. Points can slip under the bib of a mask and crush the larynx.
  3. (For women) a rigid plastic chest guard.
  4. A point-resistant fencing jacket rated at least 500 newtons. Sturdy, preferably padded and/or armoured gauntlets, which should extend at least four inches past the jacket cuff to prevent points sliding up your sleeve. I have twice had fingers broken through unpadded mail gloves, and now use a pair of fingered gauntlets from Jiri Krondak, which cost about 150€.
  5. A padded gambeson, or a plastron. If you are making one yourself, bear in mind that it should be thick enough to take the worst out of the impact of the blows, and prevent penetration from a thrust. All openings should be covered. The collar should be high enough that thrusts coming under the bib of the mask do not make contact with your throat. A plastron must wrap around the ribs, and properly cover the collar bones and shoulders. I usually wear a fencing jacket and plastron (as pictured).
  6. A box for men (called a “cup” in the US). You only forget this once.
  7. Rigid plastic protectors for the knees and
  8. For the elbows, of the sort worn by in-line skaters (worn under the
    clothes for that period look if you prefer), will save a lot of pain, and some injury.
  9. Footwear: on the matter of footwear, few practitioners agree. In the longsword treatises, there are no heavy boots, and certainly no built-up heels.  For a completely historical style, it is necessary to wear completely accurate period clothing at least occasionally, because it can affect the way you move. It does not matter much what you wear on your feet provided that you understand grounding, body-mechanics and footwork, but attaining that understanding is much easier barefoot or in very thin flat soles. Excessively grippy soles can lead to joint injury as you may stop too suddenly, or get stuck when you should be turning (particularly in falls at close quarters). The dangers of wearing too slippery soles are obvious. In the salle I usually wear medieval shoes or ‘barefoot’ shoes (aka five-fingers, or ‘toe shoes’), and recommend a thin, flat sole regardless.

You can find our current equipment recommendations here.

The Sword

Training swords come in three main types. Authentic sharp reproductions, which are used for cutting practice and some pair work with advanced students, blunt swords that try to reproduce the handling characteristics of the sharps, and fencing swords that are designed to make fencing safer. These all have their pros and cons, and you should use the sword that’s right for your style and the kind of practice you will be doing.

It’s perfectly all right to use a wooden waster or something similar to start with, but do not imagine that there is any such thing as a safe training sword. Even modern sport fencing blades engineered for fencing sometimes break and puncture people, and anything heavy enough to reproduce the handling of a medieval or renaissance sidearm is going to be able to do damage.

Looking after your weapon is largely a matter of keeping it dry, clean, and free of stress risers (a stress riser is a weak point, usually a deep nick, which encourages the blade to fold at that point).

Occasional rubdowns with a moisture repellent oil and steel wool or scouring pad, followed by a coat of microcrystalline wax, should keep the blade and hilt clean (follow manufacturer’s recommendations if you have a gilt, blued or otherwise ornamented weapon). Do not be afraid to file down any large nicks, and file off any burrs: this is important from a safety perspective, as the blade is most likely to break at a nick, and burrs can be very sharp.

The edges of a blunt weapon should always be kept smooth enough that you can run your bare hand hard up the edge and not get scratches or splinters. Even the toughest and most cherished sword will not survive repeated abuse: the best guarantor of longevity for your sword (and yourself) is correct technique.

Rules of Engagement

Once you have agreed to fence with someone, it is important to agree on rules of engagement. This is partly to ensure safety, and partly to create an environment in which you can learn. The two most simple rules are these:

  1. Confine permitted actionss to the safety limits of your protective gear
  2. Confine permitted actions to the technical range of the least trained combatant. In other words, do not allow face-thrusts when wearing open helms, or throws when one of you is not trained to fall safely. The rules can be adapted further to develop specifi aspects of technique: for instance, you may not allow any close quarters work at all, or even restrict allowable hits to one small target. The idea is to come to a clear, common -sense agreement before facing off. You are only ready for no-holds-barred, totally “authentic” fight simulation, when you can enter such a fight with your judgement unimpaired.

Following the rules of engagement will not make you soft, nor will it dull your edge if it comes to the real thing; rather it it will develop self-control.

These rules apply to all fencing:

  1. Agree on a mutually acceptable level of safety.
  2. Wear at least the minimum amount of safety gear commensurate with rule 1. Confine allowable technique to those within the limits of your equipment.
  3. Confine allowable technique to the technical ability of the least trained
    combatant.
  4. Appoint either an experienced student or one of the combatants to
    preside over the bout.
  5. Agree on allowable targets.
  6. Agree on what constitutes a “hit”.
  7. Agree on priority or scoring convention in the event of simultaneous hits. Usually it is better
    to allow a fatal blow before a minor wound, but simultaneous hits should be avoided whenever possible.
  8. Agree on the duration of the bout either in terms of hits, such as first to five, or in real time.
  9. Acknowledge all hits against yourself. This can be done by raising the left arm, or by stopping the bout with a salute, or by calling “Halt!” and telling your opponent where and how you think she hit you.
  10. Maintain self-command at all times.

Safe Training

In my experience most injuries are self-inflicted. It is far more common for students to hurt themselves by doing something they shouldn’t, than to hurt their training partners. Here are a few simple guidelines for joint safety, which should be followed during all training. I am using the lunge as an example of a stressful action, but these principles apply to any physical action.

  1. The knee must always bend in the line of the foot. Knees are hinges, with usually a little under 180° range of movement. The do not respond well to torque (power in rotation). So whenever you bend your knees, in any style for any reason, ensure that the line of your foot, the line of movement of your knee, and the line of movement of your weight, are parallel. This prevents twisting and thus injuries. This one simple rule, carefully followed, eliminates all knee problems other than those arising from impact or genetic disadvantage.
  2. Whenever performing any strenuous task (such as lunging, or lifting heavy objects), tighten your pelvic floor muscles (imagine you need to go to the bathroom, but are stuck in a queue). This supports the base of your spine, and helps with hip alignment.
  3. Joints have two forms of support: active and passive. Passive support refers mainly to the ligaments, which bind the joint capsule together. This is basically set, and can’t be trained. When training your joint strength, with exercises or stretching, avoid any action that strains the joint capsule. Any action that causes pain in the joint itself should be modified or avoided, as it may damage the soft tissues (ligaments, tendons, cartilage). These tissues have a very poor blood supply and hence heal very slowly.
  4. Active support refers to the muscles around the joint, and these can be strengthened by carefully straining the joint with small weights and rotations. To strengthen a joint you must stress these muscles, without endangering the ligaments. Any competent physiotherapist can show you a range of exercises for building up the active support around your knees, wrists and elbows, where we need it most.
  5. Rest is part of training. Your body needs time to recover, and is stimulated by the stress of exercise to grow stronger. However, the body is efficient, and will withdraw support from any muscle group that is not used, even if for only a few weeks. So regular training is absolutely crucial.

If you can’t lunge without warming up, don’t lunge except in carefully controlled drills. Warming up is essential before pushing the boundaries of what your body can do.

If you find this advice sensible and useful, please feel free to share it as widely as you like!

If you would like these guidelines as a handy PDF, then drop your email in the box below and I'll send it to you.

Beginner you are not, hmmm? image from www.freepik.com
Beginner you are not, hmmm?

Beginners are the future of any martial art. And lucky too: the best learning environment is when you are the least knowledgeable person in the room. Anyone you train with can teach you something. It is more difficult to keep learning when you are surrounded by relative beginners, and this post is about how to do it. When I moved to Finland in 2001, I was by a mile the most experienced practitioner of Historical martial arts in the country. Literally everyone I crossed longswords with knew less about them than I did. This could easily have lead to stagnation, but I managed to keep learning by:

  • Cross-training 3-4 times a week with other martial arts, one-on-one with senior instructors; basically trading classes. The potential for contaminating my interpretation was huge, but the upside was I developed a lot as a martial artist.
  • Travelling a lot to international events, paying for it by teaching classes there. I treated these trips mostly as recruitment: when I saw an instructor I thought I and my students could learn from, I hired them over to teach seminars. We average about 3-4 such seminars a year.
  • Learning how to train usefully with beginners.

This post is about the last on that list. I will summarise the approach here.

1.    Be a perfect model. The rule of beginners is this: show it to them right a thousand times, and they will eventually copy it correctly. Show it to them wrong once, and they will copy it perfectly first time. I mean no disrespect. This is just true, and I’ve never seen a beginner for whom it wasn’t. So having beginners around demands that your every action is as perfect as you can make it. No pressure then.

2.    Work at your own level. One of the things beginners have to learn eventually is the terminology of the art. So on the beginners course we do things like call out the names of the steps (accrescere, discrescere, passare, tornare, etc.) and they have to do the named step. For more experienced students in the same class this could be unimaginably tedious, but should not be: they are expected to work at their own level. So while they are all doing the same thing, some are working on remembering the terms; some working on perfecting its mechanics; and some are working through possible applications, from power generation, to avoidance, to specific plays.

3.    Use the randomiser. In pair drills, the beginner will naturally get parts of it wrong. Excellent. A genuine randomiser! The attack may be too strong, too far away, too close, in the wrong line, anything. Your job is to effortlessly and spontaneously adapt the drill to the specific conditions of the attack you get, not the one you expected. This demands 100% focus on what is happening. When it is your turn to do what they just attempted, you have to demonstrate it perfectly according to the drill, of course. Your training alternates between 100% perfect tactical choices in real time, and 100% perfect mechanics in your own time. Sounds like 100% perfect training, no?

You should also note the following:

•    The attack is never “wrong”: you get hit only if you fail to defend.
•    Your correction of the attack will be much more convincing if it comes after the attack has failed, than if you just got hit.
•    Coach by modelling, not explaining. Beginners are not stupid, they are just not-yet-skilled. They need opportunities to practise, not a lecture.
•    This kind of training demands 100% focus on the specifics of the attack that you get, not the one you expect.
•    When training with beginners, you have an opportunity to go deep, making a few actions better. But you have less chance to go wide, using a broader range of actions (because this will bewilder the already overwhelmed beginner). When paired with more experienced students, you could take the chance to go wide if it doesn’t conflict with the overall class goals.

So relish the influx of new perfection-demanding random action generators, and relish the fact that in a decade or two, they may well be vastly better at this than you are now. But they will always remember and be grateful for the help you gave them when they were starting out. You may be helping to train the next Bruce Lee, or Aldo Nadi, or even Fiore dei Liberi.

If you find this useful, please share it with your friends!

***

Before every beginners course starts, it's a good idea to go over the principles of working with beginners with your regular class. Here's how I normally do it:

Teaching Students to Work with Beginners:
We began by setting the goal of the class: to teach the students present how to train usefully with the beginners. Usefully for the beginners too, but specifically usefully for themselves. I explain briefly the three principles above, and then we apply them. This class followed the normal structure: warm-up, footwork/mechanics, dagger, longsword handling, longsword pair drills.

Warm-up
Have the students warm themselves up, structuring the 12 or so minutes according to their own current needs. For some this will the first time they have done that. This gets them into the right state of mind: using familiar structures and content, but customising them to their own needs.

Footwork
We then do the basic footwork terminology drill: I call out the names of the steps and turns and they have to do the named action. Then I have them tell me what they should be working on during that drill. Some need practice at remembering the terms; some are working on perfecting its mechanics; and some were working through the applications. We then do the stick exercise, so they have to use the steps spontaneously.

Dagger
We start as usual with perhaps the first play of the first master, and model what you should do if the attacker is either too stiff (execute the play perfectly: it works just fine), or too hesitant to strike (ignore the attack, until they learn to actually strike the mask).
18th1stmaster

We might also cover the 18th play, what you should do if they are really really stiff. This should be accompanied by a quick verbal correction, and you modelling the attack for them.

Longsword handling, solo drills
Here we distinguish between a beginners course class, and a general basic class to which beginners can attend. (In my School, all beginners are entitled and encouraged to attend all basic classes.) On the beginners course, you should stick exactly to the drill that has been set, so that the only thing the beginners see is the thing they are supposed to do. So do that thing very, very well. It’s an opportunity to work on the basics. The constraint will highlight things to practise. This lead to the following immortal line:
“All of your problems, in the salle and out of it, stem from imperfect basics.”
In normal class, students are at liberty to train the exact drill as set, or any more basic form, or any more advanced form, unless they are specifically instructed otherwise. I expect students to train at their own level.

Longsword pair drills
In the class I'm thinking of, we had been working on the stretto form of first drill the previous week, so we took it up again. (For those not in my school: first drill begins with an attack that is parried; the stretto version begins with an attack that is counterattacked into. Let me point out here that it is not the counterattack that determines largo or stretto, it’s the nature of the crossing of the blades: for a fuller discussion and examples see the wiki.)

This allowed me to point out that the “basic” version is actually mechanically more complex than the “more advanced” version. The reason for learning the first one first is that it is tactically more basic, and easier to keep in mind. First parry, then strike. Parrying and striking all in one go is harder for most people (not all) to grasp. So we then looked at these two drills as:
•    Parry against the attack (first drill, largo form)
•    Attack against the attack (first drill, stretto form)
•    Which begged the question: what happens when a parry is parried?

Which is what happens all the time with beginners learning this drill. They attack as they are supposed to, but as you start to parry, they instinctively change their motion to put their sword in the way of yours. This leads to the two swords bound together, usually near the points, and suddenly the defender’s continuation as set in the drill makes no sense.
Of course, this type of bind is shown in the treatise: the first master of the zogho largo.

1stMasterZL So we looked at the book, and executed his plays as a response to a poor attack. And then used the attack as a means to draw out the defender’s sword to where it could be bound, and practised the same actions but with different intent. The attacker could bind the sword and take advantage of the crossing generated, or the defender, perceiving the change in the attack in time, could take advantage of the fact that the attack was no longer coming towards them, and execute the plays. This made the point that the difference between beginner’s mistake and advanced technique is often more about why you do it, than it is about how.
We completed this study with the variation on first drill that leads to the third play of the master of zogho largo crossed at the middle of the swords, where his scholar grabs the blade and strikes.

3rdplay2ZLBecause those that know might be about to angulate around the parry, or parry the riposte, while beginners might just be a bit stiff. So the attack could go one of three ways (bind the parry, proceed as in the basic form, angulate), and the defender was expected to effortlessly execute the proper response. And to think: beginners will give you all that variation, at genuinely random intervals, without even being asked to or trained! How fantastically useful is that?
We concluded the class, of course, with first drill, basic form, no variations, every action perfect. Because you have to show it to them right a thousand times…


A pink candle burning in front of a rack of swords

There are many reasons why people are afraid to begin training swordsmanship, or indeed choose to follow any path, and many reasons why those who have begun the journey may quit. What follows is by no means an exhaustive list, but it contains some of the more common problems that I have encountered, and my own solutions to them. These worked for me (so far); your mileage may vary.

Fear of Failure

Perhaps the biggest step I have ever taken in which fear of failure was a major issue was opening the school. My friends at the time could tell you that I projected two possible outcomes to my mad move to Finland. One, I’d be back in six months with my tail between my legs. Two, it would fly. I chose to view the whole thing as a lesson. In other words I was going to Finland to learn something. I did not know what the lesson would be. If the school failed, if I failed, then that was the lesson.

I comforted myself with the knowledge that no matter how badly it failed, so long as I was honest and gave it all that I had, the worst possible outcome (other than serious injury) was bankruptcy and embarrassment. The culture and time I was lucky enough to be born into would not allow me to starve, nor would I be hauled off to debtors prison. Really, there was nothing to fear except my own incompetence.

Fear of success

At its root this is a fear of change. If I succeed in the thing I am setting out to do, what then? What if I actually become the person I wish to become, who am I? My solution to this was to set up my school and my training in such a way that success was impossible. There is no end goal or end result. There is only process. My mission in life is deliberately unattainable: to restore our European martial heritage to its rightful place at the heart of European culture. Of course that cannot be achieved alone, and there is no reasonable expectation of it being accomplished in my lifetime.

There is no question that European martial arts have come a long way in the last thirty years or so, and my work has been a part of that, but another excellent aspect to this goal is even if we could say it was accomplished in my lifetime, nobody would ever suggest that I did it. So fear of success is not a problem, as success is impossible.

Putting outcomes ahead of process

The most common problem I have had in my career choices to date is putting outcome before process. When I went to university to get my degree, I was more interested in training martial arts than is studying English literature, and so though I got my degree, I didn’t at the time get that much out of it. I wanted the outcome, not the process.

As a swordsmaship instructor I am a much better reader than I ever was as a literature student. Then when I went to be a cabinetmaker, again I was interested in having made the furniture more than in actually making it. Sure, I enjoyed parts of the process very much. But I did not have that dedication to perfection in process that marks a really good cabinetmaker. Ironically, now that I do it for a hobby, I enjoy the process of it a lot more.

In a similar vein to step two (fear of success) teaching swordsmanship is the only thing I have ever done where I have truly been more concerned with process them with outcome. Which is why I am a much better swordsmanship instructor than I ever was a cabinetmaker.

Writing books is another process/outcome issue. I enjoy writing books quite a bit. I absolutely hate the editing and polishing and publication process. Hence the errata. By that point outcome is everything— I just want that fucking book done and out. This is why I don’t usually think of myself as a writer. When I write, good enough is good enough. In my swordsmanship, good enough is shit, perfection is the minimum standard. Never got there, never will, don’t care, get it perfect anyway. It truly bugs me when my left little toe is in not quite the right place when I am waiting in guard.

So far, in the thousands and thousands of hours I have put into it, there have been perhaps 3 whole minutes where it felt perfect. But that’s only because my faculties of judgement were not developed enough to spot the imperfections. So, while I am deeply dissatisfied with the outcome, i.e. my current level, I am actually quite pleased with how far I have come: the process so far.

Being a swordsmanship instructor is the only thing I have ever done (other than parenting) where I am emotionally capable of perfectionism. (I will never be satisfied with my parenting skills, but am eternally satisfied with the outcome, my angel children, because of who they are, not anything they may or may not do.)

The external validation trap

This is related to the outcome/process problem. External validation tends to come from outcomes rather than processes. People bringing me one of my books to sign is hugely gratifying, and validates the outcome of all that work. But if you only write books in the hope of people asking you for autographs, the books are likely to be crap. And who wants an autograph on a crap book?

I get around this problem by thinking of my books as steps towards the overall goal of establishing European martial arts at the heart of European culture. This makes even the production of books part of a larger process. And because they are mission-oriented, I have the emotional energy reserves to demand a certain standard in them, if not quite the standard I demand of my basic strikes. (For the gold standard in books, see here!)

The external validation trap is one reason why I tend to prefer martial arts that have no belts or ranks, as it is too easy for me to care about the next belt rather than actually mastering the art. Ironically, the best outcomes are usually the result of the best processes. So the best way to get great outcomes is to forget about them and focus on the process.

Time and attention

It is not enough to want to want it. I wanted to be the sort of person who was a great cabinet-maker, but I wasn't, and didn't want it enough to become so. I only have a certain amount of energy to give, and it is what I actually choose to do that indicates what is truly important to me. The only currencies that actually matter are the ones you can’t make more of: time and attention. How one spends these vital currencies is of course influenced by the problems outlined above.

My priorities are: family first, school second, then everything else.

Within “school” it goes: teaching, research/writing, training, admin. As I see it, the school is the emergent property of the students, the teachers, and the syllabus coming together in a suitable space. My students make it all possible, they are the base, so their needs come first. The research and writing is for them, so we have an art to train. The training I do is so that I have something to show them. Admin, running the business side of things, is so far down the list it’s pathetic. I only do it so the school can keep running. Because it’s the school (students, research, and syllabus), that actually further the mission.

But as has happened more than once: if the shit hits the fan at home, I abandon the school to take care of itself, and put all my attention on the family. Of course. My mission as husband and father outranks my personal mission in life.

So, the solution to the problem of insufficient time and attention is to prioritise. Decide based on what you actually spend time doing what is truly important to you, and focus on that. It is ok to give up things you don't care about. And ok to have hobbies you just fool around with.

It is also ok, admirable even, to take an indirect route, such as becoming a banker to make tons of money to put into a noble cause. But don't squander your life on stuff you don't care about. “Follow your passion” is often bad advice, but “commit to the things you are willing to spend the time getting really good at because you believe they are fundamentally important”, is not.

This post has rambled on long enough, but clearly I need to write up “the perfectionist’s survival guide” and “mission-oriented thinking” and “why 50% of my income goes on having a salle” and of course, “I am fearful, so I study boldness”. Stay tuned and thanks for reading!

The Intermediates class on Sept 3rd 2012 was run as a freeplay class. The goal of this class was to improve students' freeplay skills, and to remind them of freeplay's place in the practice of historical swordsmanship. It went like this:

The class ran for 90 minutes and was loosely divided into five sections. We began all kitted up.

Section 1: free fencing

One pair at a time fenced, while the rest of the class watched. Each observer was given a specific thing to look for, depending on experience level. From as simple as “who got hit?” to as complex as “what specific patterns does fencer x do that you might exploit when you fence him?”. After each hit, each observer (there were four) was asked for their specific answer.

This lasted about 45 minutes, and was followed by a series of three minute rounds:

Section 2: short rounds

Three minute rounds: Everyone paired up and freeplayed for one minute. They each had to identify a problem they were having. In the second minute one fencer asked for the specific context they were having difficulty with to be reproduced for them to learn to handle it. Then the other fencer got to ask for what they needed. Total three minutes. Then change partner and repeat. Given changeover times etc, each round actually lasted about 4 minutes.

Time spent: about 20 minutes.

Section 3: general problem identification

Each student then had to identify a specific problem they were having with freeplay in general (not with a specific opponent). And in pairs or solo use the appropriate part of the syllabus to correct the problem.

Time: 10 minutes.

Section 4: identification of a problem specific to an opponent

Each student then had to identify a specific problem they were having a specific opponent. Then with a different partner (not the problem opponent), explain it well enough that their partner could mimic the problem, so they had an opportunity to solve it. So one party had to understand the problem and explain it, the other had to be able to recreate a specific technical or tactical situation that was probably not in their natural repertoire.

Time: 10 minutes

Section 5: re-establish correct form

We then spent five minutes doing form work (cutting drill etc.) in kit to re-establish correct movement habits that had eroded during the freeplay exercises.

In an ideal world we would then have done another round of freeplay to see what improvements had been generated, but we were out of time.

All in all this went so well that we decided that the first Monday intermediate class of every month will focus on either preparing for freeplay or developing freeplay skills.

Feel free to use this model for running freeplay sessions in your club.

Guy bleeding from a head wound with DDS friends
Guy in about 1999 bleeding from a sparring injury

Swordsmanship practice is inherently dangerous. The study of risk has been developed to the nth degree over the last five hundred years or so. For an excellent overview, see Against the Gods, the remarkable story of risk, by Peter Bernstein. (Thanks to my friend Lenard Voelker for sending me a copy!).

Risk Assessment

The assessment of risk may be described as assigning probabilities to events that have not yet occurred. If they have happened before, then we can see how many times over a given period, and use that data to evaluate the likelihood of it happening again.

For example, if it has snowed at Christmas 20 times in the last 100 years, you can state with some confidence that there is about a 1 in 5 chance of it happening again this year.

But many of the events we fear have no measurable risk- either because they have not happened (yet), or we have an insufficient pool of data to draw meaningful probabilities from. So they are uncertain, but have no definite probability. This distinction was drawn by Milton Keynes (and explained by Niall Ferguson on p 343 of his book The Ascent of Money).

The risk we all fear is a training accident leading to serious injury or death. In the wider world of swordsmanship practice, all of the serious accidents (which I define as requiring hospitalisation) have occurred in either competitive freeplay, or outside the bounds of a formal school (such as on the re-enactment field).

So while we know that there is a possibility of such accidents occurring in the salle, they have no definable risk as the incidence is so low. They are instead uncertain. Given the thousands of hours spent in swordsmanship training worldwide every year, and how few accidents occur, it is reasonable to assign a low probability of serious injury or death. Assuming that we do not relax our safety standards in response to this, then we can assure prospective scholars of the art that “this is dangerous, but pretty safe”.

Cars are also pretty safe these days. Airbags, crumple zones, safety glass, seat belts, all reduce the likelihood of serious injury or death in the case of a collision. But they do nothing to prevent collisions in the first place, and encourage a false sense of security. Cocooned in hi-tech armour, we ride invulnerable to our deaths. I think a shiny steel spike sticking out of the steering wheel to impale the driver at the merest fender-bender would do wonders to improve road safety.

Consuming Risk

When a risky activity becomes safer, human beings tend to consume that risk. Safer cars are driven faster. Better healthcare encourages unhealthy lifestyles. The Munich taxi experiment is an excellent example. Given better brakes, drivers went faster (see here). So protective equipment in swordsmanship offers the comforting illusion of safety. Given good protective equipment we take more risks. Yes, armour works. But tell that to the French knights at Agincourt.

Abalanced approach to swordsmanship training requires at least some time spent face to face with the naked possibility of your own death. A sharp sword, aimed at your unprotected face, in careful pair drills with a trusted, highly trained partner under competent supervision. There is nothing like a sharp steel point inches from your eyes to cut through the illusory safety of a fencing mask.

My favourite quote on this comes from Viggiani’s Lo Schermo (1575) (as translated by Jherek Swanger: note he does not translate “spada da marra”, which is a kind of blunt steel practice sword):

ROD:… but now it is time that we begin to practice, before the hour grows later: take up your sword, Conte.
CON: How so, my sword? Isn’t it better to take one meant for practice?
ROD: Not now, because with those practice weapons it is not possible to acquire valor or prowess of the heart, nor ever to learn a perfect schermo. CON: I believe the former, but the latter I doubt. What is the reason, Rodomonte, that it is not possible to learn (so you say) a perfect schermo with that sort of weapon? Can’t you deliver the same blows with that, as with one which is edged?
ROD: I would not say now that you cannot do all those ways of striking, of warding, and of guards, with those weapons, and equally with these, but you will do them imperfectly with those, and most perfectly with these edged ones, because if (for example) you ward a thrust put to you by the enemy, beating aside his sword with a mandritto, so that that thrust did not face your breast, while playing with spada da marra, it will suffice you to beat it only a little, indeed, for you to learn the schermo; but if they were spade da filo, you would drive that mandritto with all of your strength in order to push well aside the enemy’s thrust. Behold that this would be a perfect blow, done with wisdom, and with promptness, unleashed with more length, and thrown with more force, that it would have been with those other arms. How will you fare, Conte, if you take perfect arms in your hand, and not stand with all your spirit, and with all your intent judgment?
[53R] CON: Yes, but it is a great danger to train with arms that puncture; if I were to make the slightest mistake, I could do enormous harm. Nonetheless we will indeed do as is more pleasing to you, because you will be on guard not to harm me, and I will be certain to parry, and I will pay constant attention to your point in order to know which blow may come forth from your hand, which is necessary in a good warrior.

This says it all!
You can find Jherek’s translation here.

In case it is not obvious from the small sample here, Rodomonte/Viggiani's student the Conte is clearly an accomplished swordsman already, there is no suggestion of equipping beginners with sharps. As Manciolino (an ardent proponent of using blunt steel swords, as am I) put it in Book Six of his Opera Nova (as translated by Tom Leoni, and available from here):

“I now wish to show how wrong those are who insist that good swordsmanship can never proceed from practice with blunted weapons, but only from training with sharp swords. …

It is far preferable to learn to strike with bated blades then with sharp ones; and it would not be fair to arm untrained students with sharp swords or with other weapons that can inflict injury for the purpose of training new students to defend themselves.”

(with thanks to Ilkka Hartikainen for digging out and typing up the reference.)

Quite: “untrained students” find blunt steel sufficiently threatening that there is no need to make the swords sharp, and indeed it would be grossly irresponsible to do so. Highly trained and experienced students tend over time to take the blunt steel less and less seriously, and need to be reminded that swords are weapons.

Likewise, the more armour you wear, the less vulnerable you are, and the less vulnerable you feel, which tends in most people to actually increase the risk of injury as this safety margin, and a bit more, is consumed.

So have a think about the risks you are taking, and how your equipment may or may not encourage you to consume greater risks.

Search

Recent Posts

Categories

Categories

Tags